
A solid used car inspection checklist is the single most powerful tool you have to avoid buying a lemon. It gives you a methodical way to look past the shiny paint and assess a car's real condition, helping you spot hidden problems and get a fair price before you shake hands on the deal.
A solid used car inspection checklist is the single most powerful tool you have to avoid buying a lemon. It gives you a methodical way to look past the shiny paint and assess a car's real condition, helping you spot hidden problems and get a fair price before you shake hands on the deal.
Why This Inspection Checklist Matters
Buying a used car feels like a big deal because, let's be honest, it is. A polished exterior can easily mask a history of neglect or expensive mechanical faults just waiting to reveal themselves down the road. This guide isn't about vague tips; it's a step-by-step framework designed to protect your wallet and keep you safe. Without a proper system, it's incredibly easy to miss the subtle red flags that end up costing a fortune.
Think of this checklist as more than just a to-do list—it's your strategic advantage. It arms you with the knowledge to spot common, costly issues, like the first hints of rust creeping along the chassis or that slight hesitation in the transmission that a seller might "forget" to mention. Finding these things before you buy gives you serious bargaining power.
Your Best Defence Against a Bad Deal
Every single point on this checklist is there to answer a critical question about the car's health, its past, and its true value. It’s all about building a complete picture, from the depth of the tyre treads to the details in the V5C logbook. A thorough inspection transforms an emotional purchase into a smart, data-driven one, stopping you from overpaying for a car that will just become a money pit.
Buyers in the UK are getting smarter and demanding more transparency, which is why detailed pre-purchase inspections are more important than ever. In fact, the market for these professional checks is set to hit around £118 million by 2025. This isn't just a random number; it shows a clear trend of buyers refusing to leave such a big purchase to chance. You can read more about these market dynamics to see why expert-level checks are becoming the new standard.
A car that looks perfect can still hide thousands of pounds in necessary repairs. This checklist is your first and best line of defence, helping you distinguish a well-maintained vehicle from one that has been cleverly disguised to sell quickly.
Ultimately, using a used car inspection checklist is about putting yourself in control. It helps you accurately assess the risk, double-check the seller's claims, and walk away with confidence in your decision. By following the steps in this guide, you can dodge the buyer's remorse that hits when a serious fault appears just a few weeks after you've driven off the forecourt. It’s the best way to make sure your new-to-you car is a source of freedom, not a financial headache.
Decoding the Car's Exterior Story
A car’s bodywork is its autobiography, and your job is to read every chapter. This initial walk-around is more than just spotting obvious dents; it’s about uncovering the subtle clues of past accidents, shoddy repairs, and potential future problems.
Always start by viewing the car in good, natural daylight. The harsh light of a showroom or the soft focus of a rainy day can easily hide imperfections you need to see.
Get down low. Crouch at each corner of the car and look along its sides. This angle is brilliant for revealing any ripples, waves, or inconsistencies in the paint finish, which are often dead giveaways for previous bodywork. What you’re looking for is a perfectly flat, consistent reflection.
Uncovering Signs of Past Accidents
The most revealing signs of a past collision are usually in the small details a seller is hoping you’ll miss. Pay very close attention to the panel gaps—those little spaces between the doors, bonnet, boot, and wings.
Run your thumb along these gaps. They should be tight and perfectly even all the way around the vehicle. If you find a gap that’s wide enough for your finger at one end but tight at the other, it’s a huge red flag. It almost always means the panel has been replaced or poorly refitted after a prang.
Next, get a good look at the paint itself. Does the colour and texture match across the whole car? Look for tiny differences in shade or finish between adjacent panels, as this points to a respray. You should also check for overspray on the black rubber seals around the windows, on door handles, or under the wheel arches. This is a classic calling card of a rushed, cheap paint job.
Pro Tip: Bring a weak magnet with you—something like a fridge magnet works perfectly. Lightly place it on various metal body panels. If it suddenly fails to stick, especially on a lower door or wing, it's very likely because a thick layer of plastic body filler (Bondo) is hiding some significant dent damage underneath.
Scrutinising the Glass and Lights
Your exterior check isn't done until you've had a proper look at all the glass and lighting units. A tiny chip in the windscreen might seem like nothing, but it can quickly spiderweb into a large crack, leading to a failed MOT and a surprisingly costly replacement.
Carefully inspect the windscreen from both inside and outside the car for any chips, cracks, or "starburst" patterns. Don’t forget to check the side windows and rear screen for deep scratches or other damage.
The headlights and taillights also have a story to tell. Be on the lookout for any of these issues:
- Condensation: Any moisture trapped inside a light unit means the seal is broken. This will eventually lead to electrical failures and burnt-out bulbs.
- Cracks or Hazy Lenses: Severe cracks are an instant MOT failure, while cloudy or yellowed plastic dramatically reduces light output, making night driving less safe.
- Mismatched Units: Take a step back and compare the headlights. Does one look newer or clearer than the other? This often means it’s been replaced, most likely due to an accident.
Assessing Tyres and Wheels
Finally, don't overlook the tyres. They provide invaluable clues about the car's alignment and the health of its suspension. Uneven tyre wear is a clear signal of underlying issues that can be expensive to put right.
Crouch down again and examine each tyre, looking for these specific wear patterns:
- Wear on the Outer Edges: This usually points to under-inflation, but it can also be a symptom of wheel alignment problems.
- Wear in the Centre: This is typically caused by over-inflation, which is less serious but still worth noting.
- Wear on One Edge Only (Inner or Outer): This is a classic sign of a misaligned wheel, often caused by smacking a kerb or pothole. It could also suggest worn suspension components.
Check the tread depth on all four tyres—the legal minimum in the UK is 1.6mm. More importantly, make sure all four tyres are from a reputable brand and, ideally, that they match. A mix of different budget-brand tyres is a common sign that the previous owner cut corners on maintenance. If they skimped on tyres, what else did they ignore? This part of your used car inspection checklist is absolutely crucial for spotting hidden costs and ensuring your safety.
Get Inside and Play Detective with the Interior and Electronics
The inside of a car is where the real story lives. A seller can spend an afternoon with a polisher to make the outside look brand new, but the interior’s condition tells a far more honest tale about how the vehicle has been treated. Your job here is to see if the cabin's story matches the number on the odometer.
A car with genuinely low mileage should look and feel the part. If the dashboard shows 30,000 miles but the driver's seat bolster is torn to shreds and the steering wheel is shiny smooth, you've found a major red flag. Something doesn't add up.
Reading the Signs of Wear and Tear
Start by focusing on the high-contact areas. These are the spots that reveal a car's true mileage and level of care far more accurately than a digital display.
Zero in on the driver's seat, especially the outer bolster—that's the bit you slide across every single time you get in and out. If it's frayed, the foam feels crushed, or the leather is cracked and peeling, it suggests a huge number of journeys, which just doesn't align with a low-mileage claim.
From there, move on to the other key touchpoints:
- Steering Wheel: A leather wheel on a low-mileage car ought to have a matte, textured finish. A wheel that’s glossy and slippery to the touch has been held by a lot of hands for a lot of miles.
- Gear Knob and Handbrake: Just like the steering wheel, check for excessive smoothing, peeling, or wear on these frequently used controls.
- Pedals: The rubber pads on the brake and clutch pedals wear down over time. If they're worn right through to the bare metal, you’re almost certainly looking at a car that’s covered some serious distance.
These checks are your secret weapon. A dishonest seller might try to "clock" a car by illegally winding back the mileage, but they almost never bother replacing these tell-tale interior parts. Your careful observation here is a powerful tool in your used car inspection checklist.
Systematically Test Every Button and Switch
Modern cars are complex machines, packed with electronics. Even a single faulty component can lead to a surprisingly expensive repair. Your mission is to be methodical—test everything. Don't be shy and don't rush; it's easy to forget something in the excitement.
Turn the engine on and start working your way around the cabin, checking each system one by one. This systematic approach ensures nothing gets missed.
Your Electronics Checklist Should Include:
- Climate Control: Crank the air conditioning to full cold. Does it get properly icy within a minute? Now switch to max heat—does it get nice and toasty? Make sure you test all the fan speeds and directional vents.
- Windows and Mirrors: Run every electric window up and down, using both the main driver's panel and the individual switch on each door. Check the electric mirror controls move the mirrors in all directions.
- Infotainment System: Don't just see if it turns on. Connect your phone via Bluetooth, plug a cable into the USB ports, and check the sat-nav. Is the touchscreen responsive or annoyingly laggy?
- Lights and Wipers: Flick on all the interior lights, including the often-forgotten ones in the glovebox and boot. Go through every windscreen wiper setting, front and back, and don't forget to test the screen wash.
A failed air conditioning compressor is a classic expensive fault. If you hear a loud clicking or grinding noise when you switch the A/C on, or if the air simply never gets cold, you could be looking at a repair bill running into hundreds of pounds. This is a brilliant point for negotiation if you're still interested.
Hunt for Hidden Water Damage
Water damage is one of the worst problems a used car can have. It’s destructive, notoriously difficult to fix, and often a total deal-breaker. You need to put your detective hat on for this one.
Your best tool, initially, is your nose. A persistent musty, damp, or mildew smell is a massive red flag. It means moisture is trapped somewhere it shouldn't be. Don't let a dangling air freshener throw you off the scent.
Next, get your hands dirty. Lift up the floor mats in every footwell and press your hand firmly onto the carpet beneath. Any hint of dampness is a serious cause for alarm. Be sure to check the boot floor too—lift the carpet and feel around the spare wheel well, a notorious spot for water to collect.
Finally, look for signs of persistent condensation on the inside of the windows or even moisture trapped inside the interior light fittings. These are clear giveaways that water is getting in. Frankly, if you find any convincing evidence of water ingress, it’s usually best to thank the seller for their time and walk away.
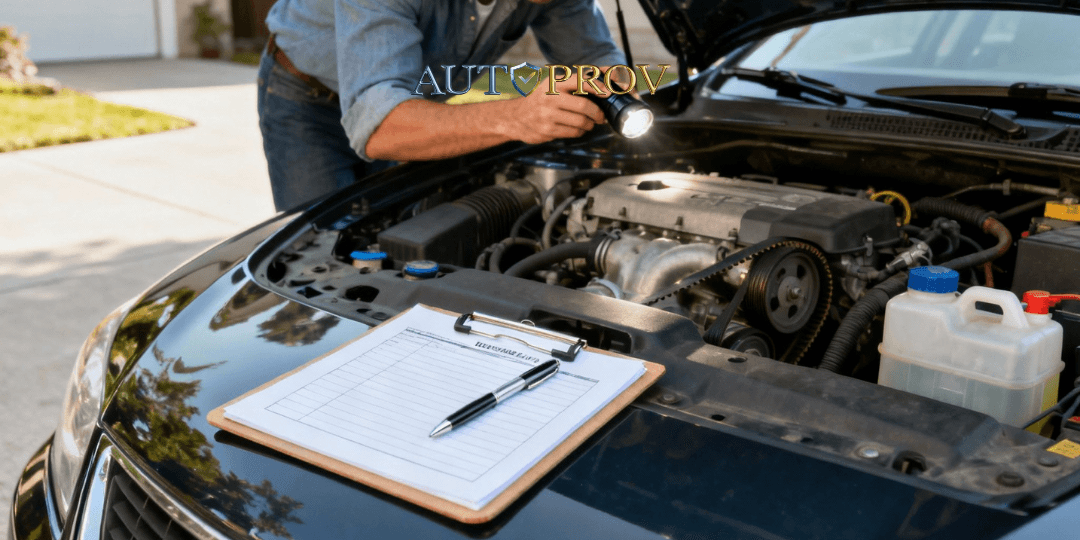
A Practical Look Under the Bonnet
Popping the bonnet can feel like the most intimidating part of a used car inspection. It’s a complex maze of wires, hoses, and metal, but you really don’t need to be a mechanic to spot the most serious red flags. This part of your check is all about looking for clear, visual signs of neglect or potential disaster.
First things first, make sure the engine is cold before you start poking around. A warm engine can easily hide certain problems and is a safety risk. Just touch the back of your hand to the engine cover. If a seller insists on warming the car up before you arrive, be wary—they might be trying to hide a tricky cold-start issue.
Once you’re safely under there, just take a moment to look. Does the engine bay look almost too clean, as if it’s been steam-cleaned? While it might look impressive, this can be a sneaky tactic to wash away evidence of fluid leaks. A bit of road grime is perfectly normal on a used car; a spotless engine bay is suspicious.
Mastering the Essential Fluid Checks
The fluids are the lifeblood of any car, and their condition tells you a massive amount about its health. Checking them is straightforward and one of the most important things you can do.
Start with the engine oil. Pull out the dipstick, wipe it clean on a rag, pop it back in fully, and then pull it out again. The level should be between the minimum and maximum marks. But more importantly, what does the oil itself look like? Healthy oil is a light amber or dark brown.
- Gritty or jet-black oil: This is a sure sign it's long overdue for a service.
- Water droplets or a milky, coffee-like colour: This is a huge red flag. It almost always means coolant is mixing with the oil—a classic symptom of a failed head gasket, which is a brutally expensive repair.
Next, unscrew the oil filler cap and check the underside. Any creamy, mayonnaise-like sludge is another tell-tale sign of that dreaded head gasket problem.
After the oil, move on to the other key fluids:
- Coolant: Find the coolant reservoir (it's usually a semi-transparent plastic tank). The fluid should be a bright colour—often pink, green, or blue—and sit between the 'min' and 'max' lines. If it’s rusty, brown, or has an oily film floating on top, that’s a bad sign pointing to internal engine trouble.
- Brake Fluid: This is typically in a smaller reservoir near the driver. The fluid should be a clear, light golden colour. Dark, murky brake fluid means it needs changing and suggests the braking system may have been neglected.
Spotting Leaks and Examining Belts
With the fluids checked, it’s time to hunt for leaks. A torch is your best friend here, even in broad daylight. Scan the engine block carefully, looking for wet patches, drips, or dark stains that show an active leak of oil, coolant, or power steering fluid. Pay close attention to where hoses connect to the engine.
While you're at it, have a good look at the visible belts, especially the alternator or serpentine belt. It should look in decent nick, without any of these problems:
- Glazing (a shiny, smooth appearance)
- Fraying along the edges
- Cracks running across the ribs
A worn belt isn’t a deal-breaker on its own, but it points to a car that may not have been serviced properly. On that note, give the rubber hoses a gentle squeeze (only when the engine is cold!). They should feel firm but pliable. Hoses that are rock-hard, brittle, or mushy are at risk of failing soon.
The rise of digital tools is changing how these checks are viewed. Today, cars with clear photos of a clean engine bay and a detailed digital inspection report tend to sell 24% faster and for 7% more money. Certification schemes are also booming, with certified pre-owned cars now making up 28% of UK used vehicle sales. Buyers have more confidence in these vehicles, especially with EVs where battery health reports are vital, as they result in 45% fewer warranty claims. You can discover more insights about UK used car market trends here.
Never underestimate what a simple visual check under the bonnet can reveal. You're not trying to diagnose the exact fault; you're looking for undeniable evidence of neglect or serious mechanical trouble. Finding milky oil or a significant fluid leak gives you all the reason you need to either walk away or insist on a massive price reduction to cover a professional diagnosis. This is where your used car inspection checklist truly protects your investment.
Mastering the All-Important Test Drive
This is where the rubber literally meets the road. All your checks and research come together in the test drive. It’s your one chance to get a real feel for the car, moving beyond a static inspection to see how it actually performs. A well-planned drive can uncover problems you’d never spot with the car just sitting on the kerb.
Forget a quick spin around the block. You need to put the vehicle through its paces to properly test the engine, gearbox, steering, and brakes under different conditions.
Designing a Strategic Test Route
Before you even turn the key, have a route mapped out in your head. A proper test drive should last at least 20-30 minutes and cover a mix of road types. This variety is crucial for revealing issues that only surface in specific situations.
Try to include these in your route:
- Stop-and-Go Town Traffic: This is the perfect environment to test a manual clutch's biting point, the smoothness of an automatic gearbox at low speeds, and how the cooling system copes with idling.
- A Bumpy or Uneven Road: Hunt down a road with a few potholes or a rough surface. This is your chance to listen for any creaks, rattles, or clunks coming from the suspension.
- An A-Road or Dual Carriageway: You need to get the car up to 50-60 mph. This is where you'll feel for wheel balance issues, steering vibrations, and check the engine’s performance at higher revs.
- A Quiet, Open Area: An empty car park is ideal for testing the steering from full lock to full lock and making slow manoeuvres to check for any weird noises.
The sensations you feel through the steering wheel and pedals are just as important as the sounds you hear. A slight vibration that only appears at 55 mph could signal an unbalanced wheel, a worn driveshaft, or a more serious issue. Don't ignore these subtle clues.
What to Feel, Hear, and See on the Road
During the drive, kill the radio and concentrate. You're using all your senses to detect anything that feels off.
Engine and Transmission Sensations
- Does the engine idle smoothly, or is it stuttering and hunting for revs?
- When you accelerate, is the power delivery smooth? Any hesitation or flat spots are a red flag.
- If it’s an automatic, do the gear changes feel seamless, or do they thud and jerk?
- For a manual, is the clutch biting point clear and not ridiculously high? Does the gear lever slot into each gear easily, without any grinding?
Steering and Suspension Checks
- On a straight bit of road, does the car pull to one side if you briefly let go of the wheel? This points directly to alignment problems.
- Listen carefully as you go over bumps. Loud knocks or bangs often suggest worn-out suspension parts like bushes or shock absorbers.
- Do you hear any clicking or grinding noises when turning sharply? This could be a problem with the CV joints.
Braking Performance
Find a safe spot with no one behind you and, from around 30 mph, apply the brakes firmly. The car should stop in a dead straight line without pulling left or right.
The brake pedal should feel firm, not spongy or soft. Any squealing, grinding, or shuddering through the pedal is a clear sign the brakes need work.
Finalising the Paperwork Verification
After the drive, it’s time for the final, critical step: checking the paperwork. This is where you confirm the car’s identity and history, tying everything together.
Get the V5C logbook in your hands and meticulously match the Vehicle Identification Number (VIN) on the document to the VIN on the car itself. You’ll usually find the VIN at the base of the windscreen (passenger side) and on a sticker inside the driver's door jamb. If they don’t match perfectly, walk away. Simple as that.
Next, pore over the service history and the online MOT records. Do the mileages recorded at each service and MOT make sense? Look for recurring advisories for the same issue—like corrosion or an oil leak—that have clearly been ignored. This is a massive part of your used car inspection checklist that reveals a lot about the previous owner’s attitude to maintenance.
With the UK used car market predicted to hit around 7.64 million transactions in 2025, cars are changing hands faster than ever. This brisk pace makes a thorough, data-backed inspection non-negotiable if you want to avoid a costly mistake. You can explore detailed forecasts on the UK's used car market here. Combining your hands-on inspection with this final document check gives you the complete, undeniable picture of the car you’re about to buy.
Answering Your Final Questions
Even with the best checklist in hand, you'll always have a few last-minute questions swirling around as you get close to a decision. Knowing how to handle these moments is what separates a good buy from a bad one. This section tackles the most common and critical questions that pop up during an inspection.
Think of this as the "what if" part of your inspection plan. It’s about knowing how to react to serious findings and when to trust your gut.
What Are the Ultimate Deal-Breakers?
Some problems just aren't worth the hassle or the inevitable repair bill. While a few minor scratches can be a great way to negotiate the price down, certain issues should have you walking away without a second thought. Your time and money are better spent elsewhere.
You're looking for the big stuff here—major structural or mechanical faults that scream "money pit" or, worse, "unsafe".
- Signs of Frame Damage: Any hint of a serious past accident is a non-starter. Look for dodgy-looking welds underneath the car or body panels that just don't line up, no matter how you look at them. A compromised frame means the car's core integrity is gone for good.
- Milky Engine Oil: If you pop the oil filler cap and see a creamy, coffee-coloured sludge, run. This is the classic, tell-tale sign of a blown head gasket, which is easily one of the most eye-wateringly expensive engine repairs you can face.
- Serious Chassis Rust: Don't get surface rust on an exhaust pipe confused with proper, structural corrosion. If you see deep, flaky rust on the main chassis rails, the sills, or where the suspension bolts to the body, you're looking at a terminal diagnosis.
Is It Worth Paying for a Professional Inspection?
In a word, yes. Especially if you're not a confident mechanic or if the car is a significant purchase for you. Getting a professional pre-purchase inspection (PPI) from a trusted local garage or a mobile mechanic is one of the smartest investments you can make.
A professional inspection is your insurance policy against a multi-thousand-pound mistake. It costs a fraction of a potential engine or gearbox repair, and a good mechanic will spot things you simply can't, like hidden fault codes in the ECU or subtle problems only visible when the car is up on a ramp.
How the seller reacts to your request is also incredibly revealing. If they get defensive or refuse to allow a PPI, that's a massive red flag in itself. A seller who's confident in their car will have absolutely no issue with an expert giving it the once-over.
How Can I Reliably Check a Car's History?
Never, ever take the seller's word for it. Verifying the car's history is the data-driven part of your check that confirms everything you've seen in person. Thankfully, getting the real story is easier than ever.
Your first stop should be the free online MOT history checker on the GOV.UK website. Just type in the registration number. It will show you every single MOT pass and fail, the mileage recorded at each test, and a list of all advisory notes. It's a goldmine for spotting recurring issues the owner may have been ignoring.
But for the full story, you have to invest in a complete vehicle history check from a trade-grade provider like AutoProv. This report uncovers the critical details the MOT history leaves out, such as:
- If the car has outstanding finance owed on it
- Whether it has ever been reported as stolen
- If an insurance company has previously written it off
When you combine your own hands-on inspection with this official data, you get the complete, undeniable picture you need before you part with your cash.
Frequently Asked Questions
AI-Generated Content Notice
This article was created with the assistance of artificial intelligence technology. While we strive for accuracy, the information provided should be considered for general informational purposes only and should not be relied upon as professional automotive, legal, or financial advice. We recommend verifying any information with qualified professionals or official sources before making important decisions. AutoProv accepts no liability for any consequences resulting from the use of this information.
From our AI insights
- Navigating Regional Car Buying Trends in the UK
Explore unique regional car buying trends across the UK and make informed decisions.
- Navigating Seasonal Car Buying in the UK
Learn how UK seasons affect car buying, with actionable tips for each season.
- Understanding UK Vehicle Tax: A First-Time Buyer's Guide
Navigate UK vehicle tax rules with ease. Essential for first-time buyers.
Related Articles

Your Ultimate Guide to Buying a Used Car in the UK
Navigate the UK used car market with confidence using our comprehensive buying guide. Tips, checks, and AutoProv Provenance insights included.

Difference Between MOT and Service: What You Need to Know
An MOT is a mandatory legal inspection that every car on UK roads needs to pass.Think of it as the government's way of ensuring your vehicle meets the absolute minimum safety and environmental standards to be considered roadworthy. A service, on the other hand, is a completely different beast. It's the proactive maintenance routine recommended by the people who built your car, designed to keep it running smoothly and catch problems before they start. In short, an MOT is a pass-or-fail exam required by law. A service is a comprehensive health plan for your car.

What Is a Good Mileage for Used Cars? Top Tips as a UK Buyer
When you're hunting for a used car, one of the first things you’ll probably look at is the mileage. It's a quick, easy number to latch onto. But what actually counts as ‘good mileage’ in the UK?
Published by AutoProv
Your trusted source for vehicle intelligence
