
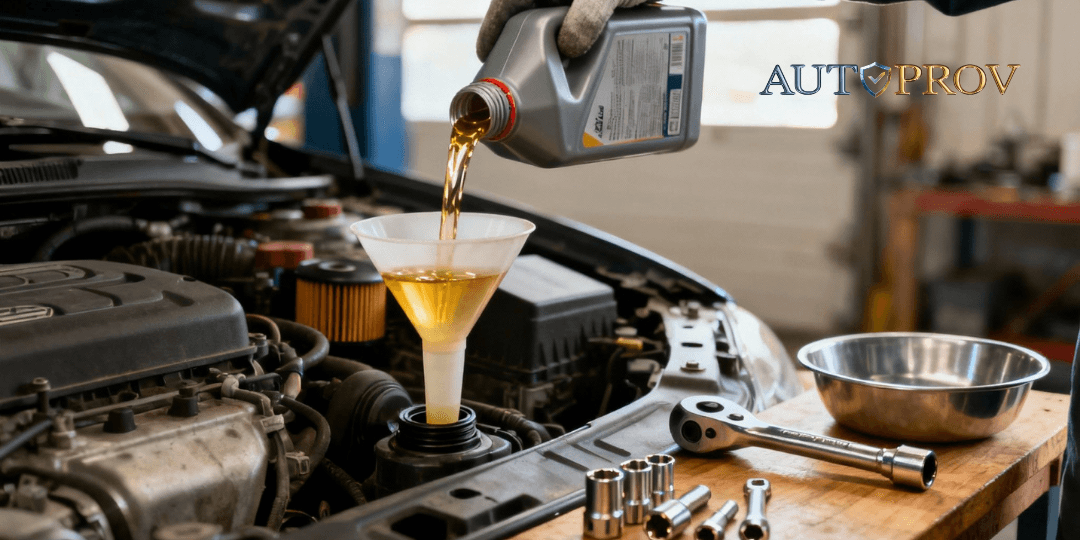
An engine oil change isn't just another task on your car's maintenance list; it's the single most important thing you can do for its long-term health. It’s a straightforward process: drain out the old, grimy oil and replace it with fresh, clean oil and a new filter. Getting this done regularly is absolutely vital for engine health, as it protects all those crucial internal parts from friction, heat, and damage. Skip it, and you’re risking serious performance problems and some eye-watering repair bills down the road.
An engine oil change isn't just another task on your car's maintenance list; it's the single most important thing you can do for its long-term health. It’s a straightforward process: drain out the old, grimy oil and replace it with fresh, clean oil and a new filter. Getting this done regularly is absolutely vital for engine health, as it protects all those crucial internal parts from friction, heat, and damage. Skip it, and you’re risking serious performance problems and some eye-watering repair bills down the road.
Why Fresh Oil Is Your Engine's Best Friend
It’s easy to think of an oil change as a chore, but it’s better to see it as a smart investment in your car's future. Fresh oil is the lifeblood of your engine, and it’s doing a lot more in there than you might think.
As you drive, the oil in your engine slowly breaks down. It gets contaminated with dirt, tiny metal particles, and a nasty build-up called sludge. When that happens, it can’t lubricate properly anymore. This creates more friction between moving parts like the pistons and cylinders, which in turn generates a ton of excess heat and accelerates wear.
The Core Benefits of Regular Oil Changes
Sticking to a consistent oil change schedule brings real, tangible benefits that you'll notice in how your car drives and in your bank account. It's the very foundation of preventative maintenance.
A key benefit is Improved Engine Performance, as clean oil lets all the engine components move freely and without resistance, helping it run at its best. You will also experience Better Fuel Economy, because a happy, well-lubricated engine doesn't have to work as hard. That means better mileage and fewer trips to the petrol station. Finally, you ensure an Extended Engine Life. By stopping sludge from forming and cutting down on friction, you're actively preventing the kind of internal damage that can lead to catastrophic failure.
At AutoProv, we see the consequences of neglected maintenance every day in vehicle history reports. A regular engine oil change is one of the most cost-effective ways to protect your asset and ensure its future value.
Sticking to the Right Schedule
Here in the UK, most car manufacturers suggest an engine oil change every 12 months or 12,000 miles—whichever comes first. For the average driver, this is a solid rule of thumb to follow.
That said, modern synthetic oils can sometimes push those intervals a bit longer, perhaps up to 15,000 miles if your driving consists mainly of long, steady motorway journeys. For a deeper dive into vehicle upkeep, our guide on essential car maintenance tips for UK drivers has plenty of extra info.
Gathering Your Tools and the Right Oil
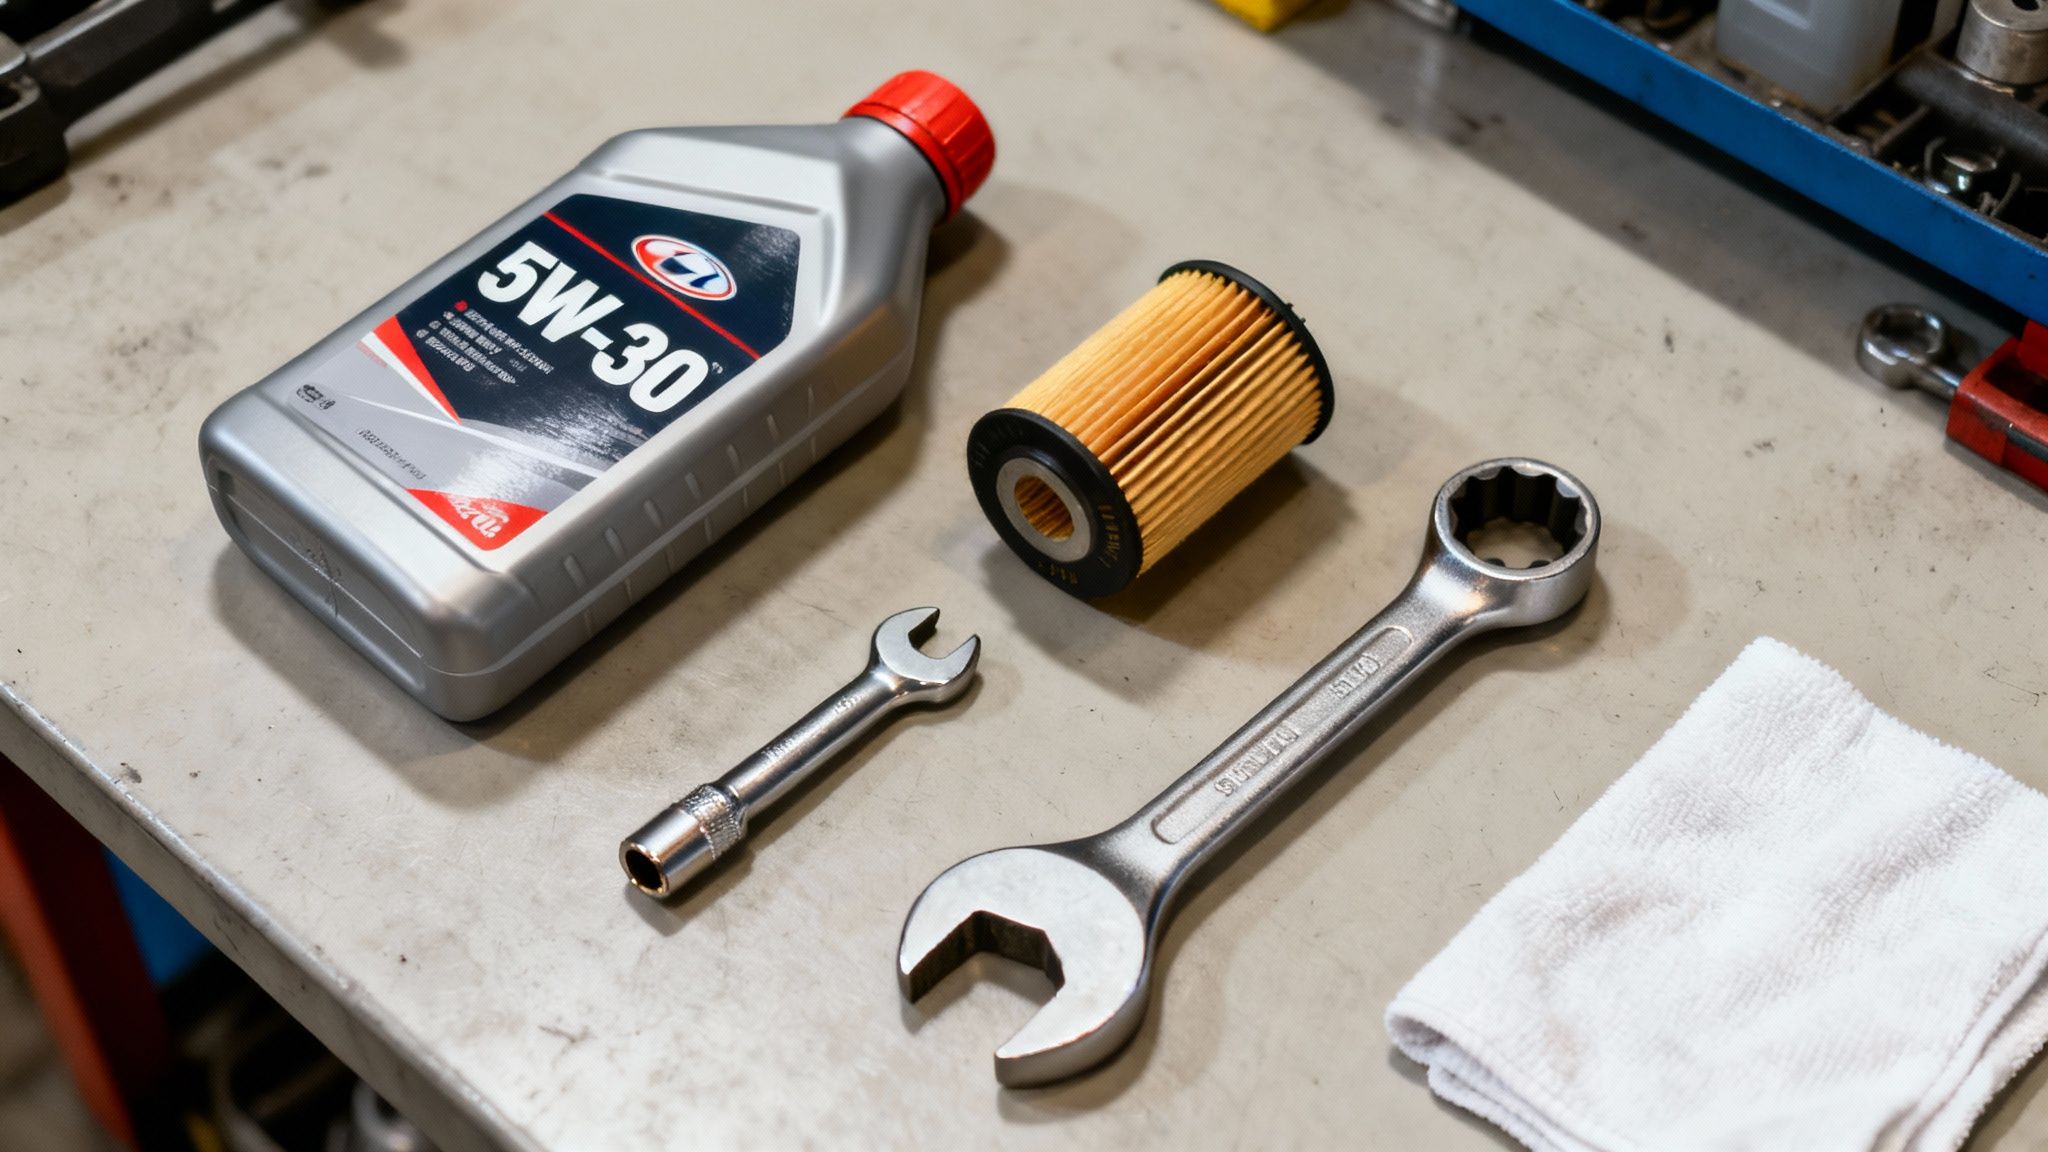
Before you even think about sliding under the car, a successful engine oil change is all about having the right kit laid out and ready to go. Good preparation is what separates a quick, satisfying job from a frustrating, messy ordeal. Let's get your toolkit sorted first.
You'll need a few essentials. A decent socket set is non-negotiable, and you'll want a six-point socket that fits your car's sump plug perfectly. Trust me, the six-point design grips the bolt head much more securely and drastically cuts the risk of rounding it off – a real headache you want to avoid. You’ll also need a reliable oil filter wrench, a sturdy funnel, and a drain pan that can hold at least six litres of old oil.
Choosing the Correct Engine Oil
This is easily the most critical decision you'll make in the whole process. Using the wrong oil is one of the fastest ways to cause serious, expensive engine problems, so it’s absolutely vital to get it right. The golden rule is to stick to the manufacturer's recommendation, which you'll find in your vehicle’s handbook.
You need to pay attention to two main things: the Viscosity Grade and the Oil Type. The viscosity grade is the code that looks like "5W-30" or "10W-40". The first number (with the 'W' for winter) tells you how the oil flows at cold temperatures, while the second number shows its thickness once the engine is up to temperature. For oil type, you’ll see three main options on the shelf: conventional, semi-synthetic, and fully synthetic. Fully synthetic offers the best protection and lasts the longest, but it’s crucial to use what your car was designed for.
Don’t be tempted to guess or grab a "one-size-fits-all" product. Your engine was engineered with a specific oil formulation in mind. Sticking to that specification is the only way to guarantee optimal performance and protection.
The sheer variety of oils out there reflects a massive market. To give you an idea, the UK's automotive engine oil market volume was around 127.5 million litres and is projected to keep growing. That demand, driven mostly by passenger cars, shows just how many people are out there doing this essential maintenance. You can discover more about the engine oil market trends here.
Ultimately, matching the oil to your car’s needs is the foundation of a good engine oil change. Check the handbook, buy the right grade and type, and you’ll be giving your engine exactly what it needs to run smoothly for miles to come. If you’re ever unsure, services like AutoProv are invaluable for professionals, providing detailed vehicle specifications to help them make the right choice every single time.
Getting the Job Done: How to Perform an Engine Oil Change Safely
With your tools laid out and the correct oil on hand, it's time to get stuck into the engine oil change. It’s a pretty straightforward job, but don't rush it. Being methodical and putting safety first is the key to a clean, successful oil change every single time.
First things first, let's get the car prepped. I always recommend running the engine for a couple of minutes to warm the oil up. Warm oil is thinner and flows much better, which means it will drain out faster and carry more of the gunk and contaminants with it. Just warm is fine – you don't want it scalding hot.
Next, find a perfectly flat and level spot to park. Pull the handbrake on tight. This is non-negotiable: never, ever work under a car that’s only held up by a jack. Use your jack to get the car lifted, then slide axle stands under the manufacturer's designated support points. Before you even think about sliding underneath, give the car a good, firm shove to make sure it’s completely stable.
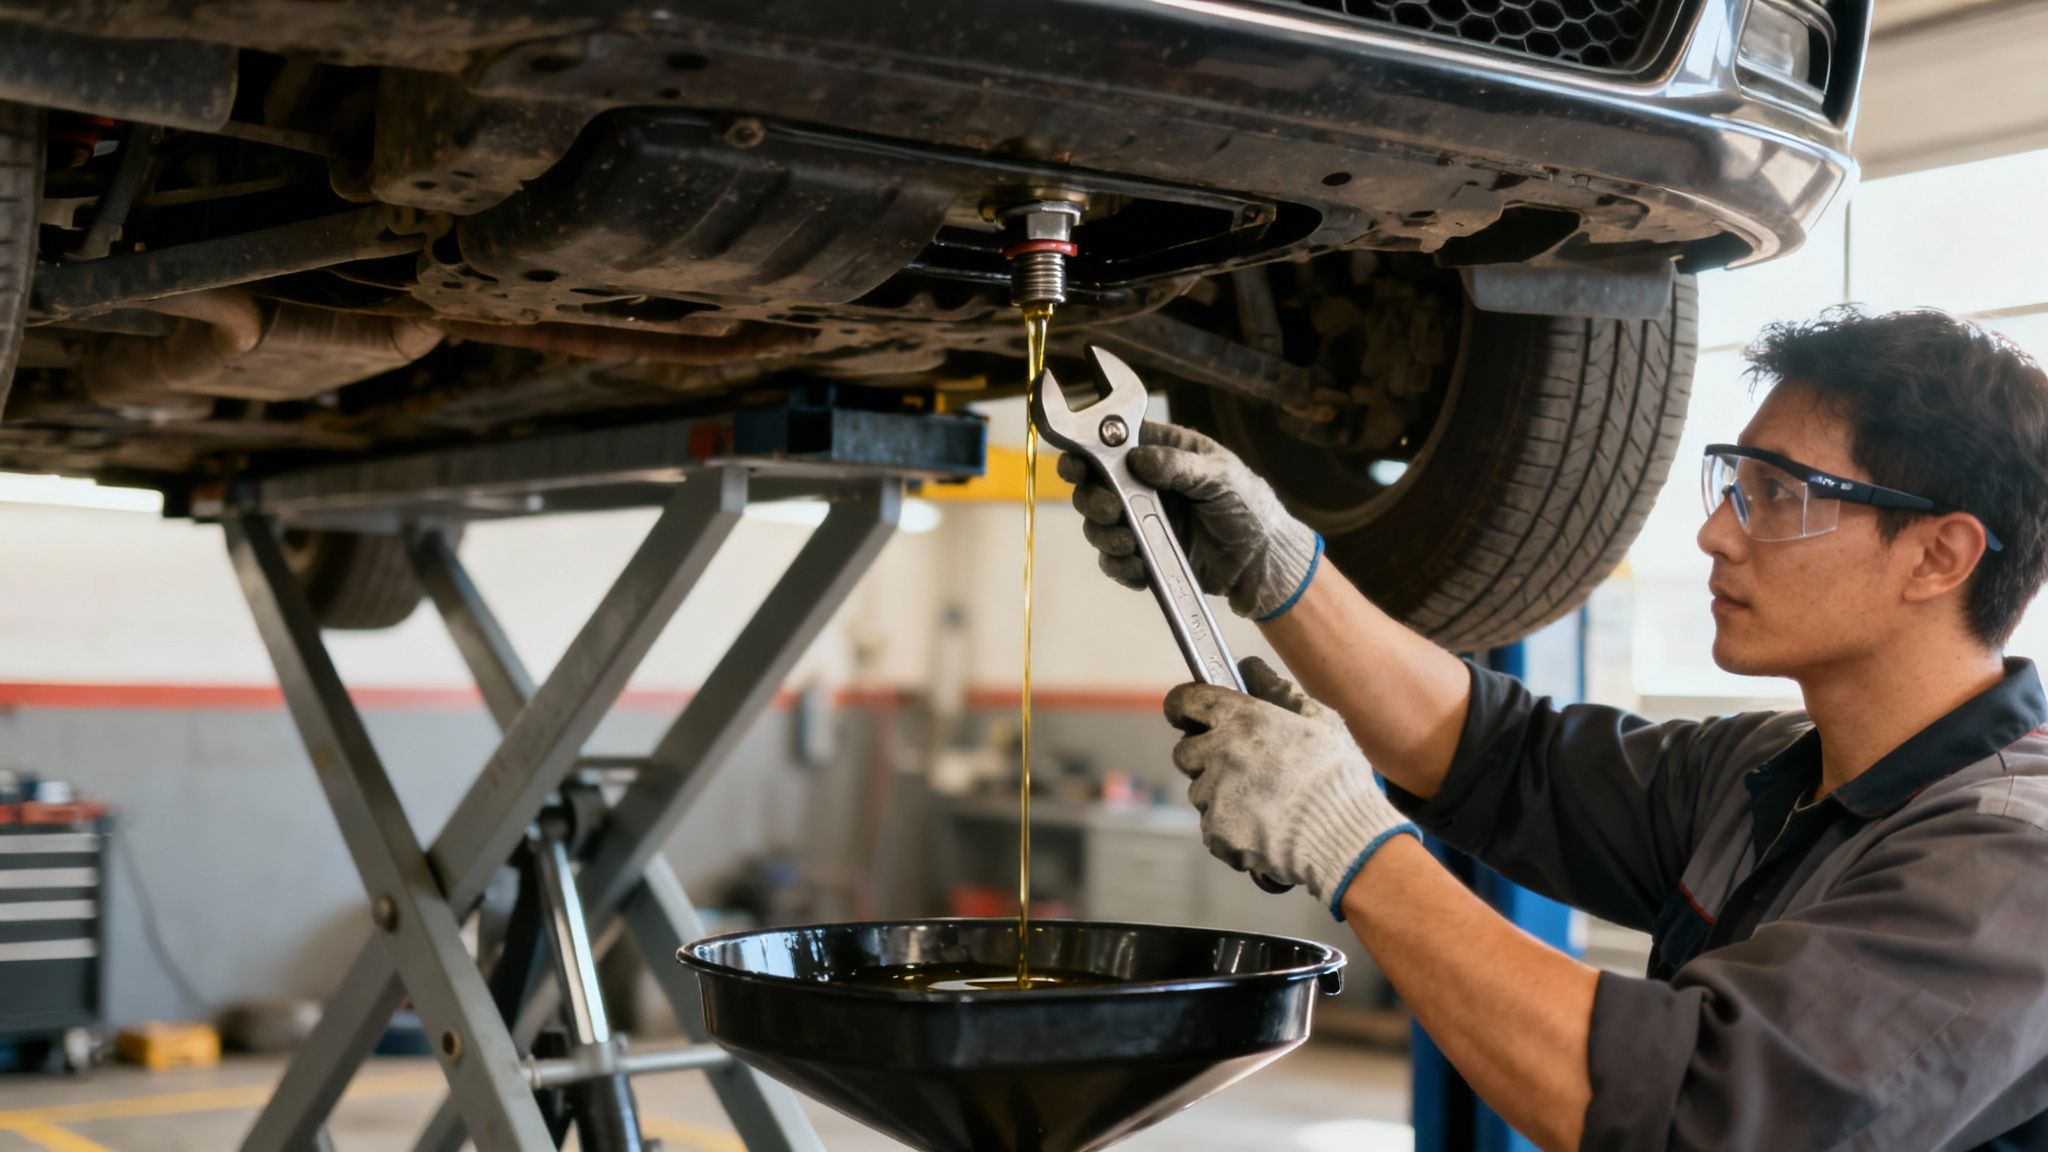
Locating and Draining the Old Oil
Once you're safely under the car, your first target is the engine’s oil sump. It's the metal pan right at the bottom of the engine. The sump plug (or drain bolt) will be at its lowest point, which makes sense.
Position your drain pan directly underneath the plug. Grab the correct size spanner or socket and turn the plug anti-clockwise to loosen it. Using the wrong tool here is a classic rookie mistake that can easily round off the bolt head, creating a real headache. I always do the last few turns by hand – it gives you more control and stops you from dropping the plug into a pan of hot oil.
While the old, dark oil is draining out, you can shift your attention to the oil filter. This is a metal canister, usually painted black, blue, or white, that’s screwed into the side of the engine. Use an oil filter wrench to get it moving, again turning it anti-clockwise. Be ready for a bit more oil to spill out as you unscrew it.
One of the most common DIY mistakes is overtightening everything on the way back together. The sump plug just needs to be snug, not Herculean-tight. A new oil filter should be tightened by hand until it makes contact with the engine block, then given just another quarter to half a turn. This creates a perfect seal without causing damage, and you'll thank yourself on the next oil change.
Installing the New Filter and Refilling
Before you fit the new filter, dip your finger in some fresh engine oil and wipe a thin film around the rubber gasket on top. This little trick helps create a good seal and stops the gasket from sticking or tearing when you tighten it.
Once the old oil has slowed to a final drip, wipe the sump plug area clean. Now you can refit the sump plug, tightening it firmly but not excessively. With that done, carefully screw on your new, pre-lubricated oil filter using that "hand-tight plus a quarter-turn" rule.
For those who prefer a professional touch, the meticulous standards outlined here are exactly what technicians rely on. Using a service like AutoProv gives them access to precise vehicle specifications, ensuring every step, from selecting the right filter to knowing the exact oil capacity, is done correctly.
Finishing the Job and Responsible Disposal

With the old oil drained and the new filter spun on, you’re on the home straight. But don't rush this part. Getting the refill and final checks spot on is just as crucial as the draining process, ensuring your engine is perfectly protected for the thousands of miles ahead.
The golden rule here is to avoid overfilling at all costs. Too much oil can be just as damaging to an engine as too little. Start by pouring in about 80% of your engine’s total oil capacity—you'll find this figure in your owner's handbook. Give it a good minute for the new oil to trickle down into the sump.
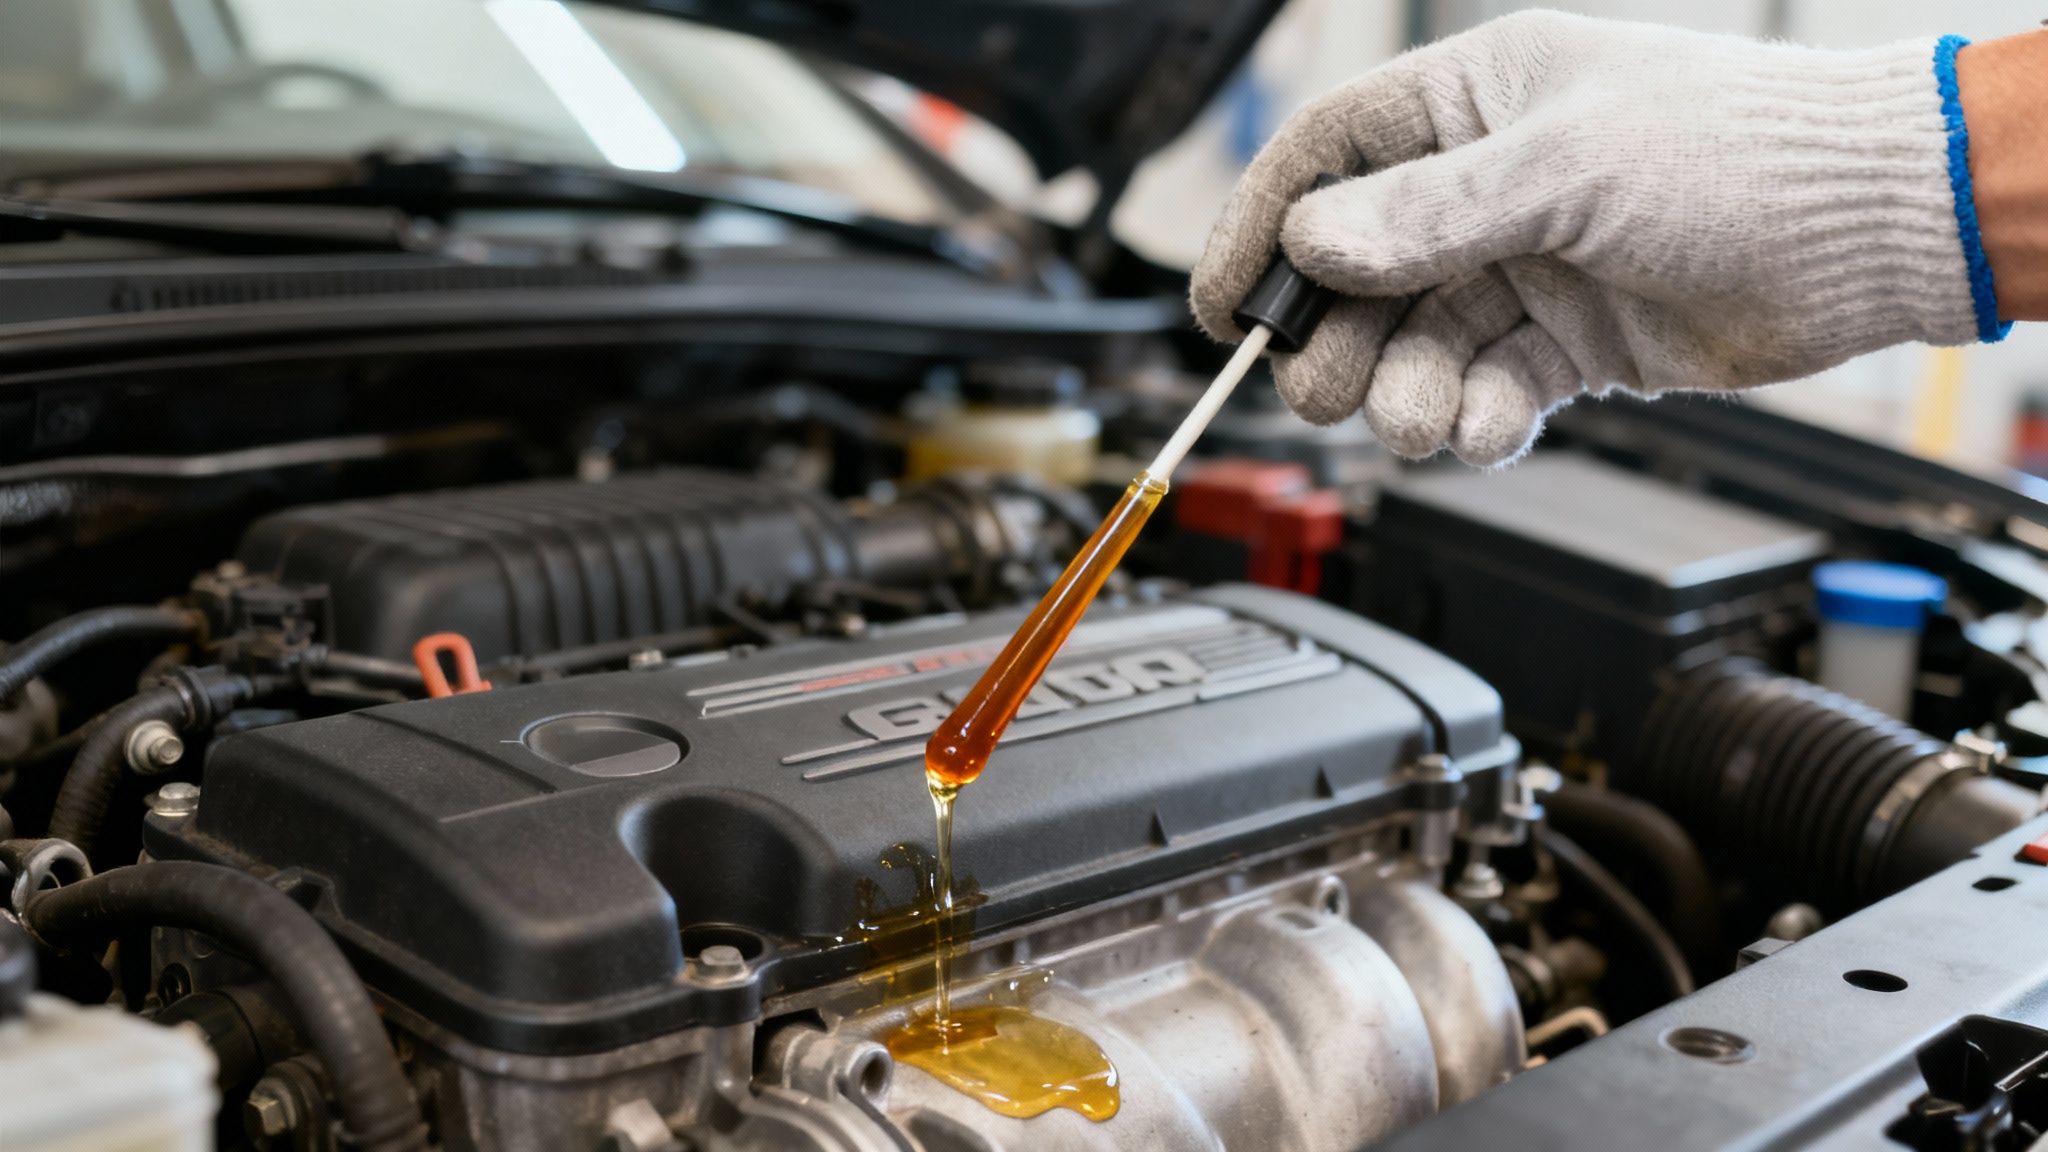
Next, pull out the dipstick, give it a thorough wipe with a clean rag, push it all the way back in, and pull it out again. At this point, the level should be sitting comfortably below the maximum mark. That’s exactly what you want to see.
The Final Checks
Now comes the fine-tuning. Slowly add a little more oil, checking the dipstick after each small addition, until the level hits the ‘MAX’ line perfectly. Whatever you do, don't go over it.
Once the level is bang on, screw the oil filler cap back on securely. The next step is one that many people miss, but it's vital for an accurate final reading. First, fire up the engine and let it tick over for about sixty seconds. This gets that fresh oil circulating properly and, most importantly, fills up the new oil filter. Next, shut the engine off and let it sit for about five minutes. This allows the oil to settle back into the sump. Finally, do one last dipstick check. You'll likely need to top it up a tiny bit more.
It's such a common mistake to skip this final check. People forget that a new, empty oil filter can hold up to half a litre of oil. Running the engine fills that filter, causing the level in the sump to drop. This final verification ensures your engine has precisely the right amount of oil it needs to run smoothly.
How to Dispose of Used Engine Oil
Right, your part of the job isn't quite over yet. That old engine oil is classified as hazardous waste here in the UK. Just pouring it down a drain or chucking it in the bin is not only illegal but also causes serious environmental harm.
Thankfully, getting rid of it responsibly is dead simple. Carefully pour the used oil from your drain pan back into the empty bottles your new oil came in. Almost every local council recycling centre has a dedicated tank for used engine oil, and it's a completely free service.
Taking this final step ensures your successful DIY engine oil change is also an environmentally friendly one. Job done.
Weighing the Costs and When to Call in a Pro
Doing your own engine oil change is a great way to get to know your car, and it can be really satisfying. But let's be realistic – it isn't always the most practical or even the cheapest option for everyone. Before you start buying up tools, it’s worth taking a moment to compare the cost of doing it yourself against the convenience of letting a garage handle it.
So, what does a professional oil change actually cost? In the UK, you can expect the average to be around £132, but this figure can swing quite a bit. A smaller car like a 1.0-litre Ford Fiesta might only set you back about £115, whereas a bigger 2.0-litre Audi A3 could be closer to £141. Your postcode matters, too; you'll almost always pay more in London than you would in Manchester or Glasgow.
Knowing When to Throw in the Towel
Sometimes, the smartest move you can make is to step away from the car and pick up the phone. DIY is fantastic, but there are times when pushing on can turn a simple maintenance job into a very expensive repair.
You should probably call a garage if the sump plug is completely seized or you’ve rounded it off trying to get it loose. It is also wise to seek professional help if you're not 100% certain which specific oil your modern, and likely quite particular, engine needs. Finally, if you simply don't have the time, the right tools, or a safe, flat space to get the job done properly, a garage is your best bet.
Trusting a professional isn’t admitting defeat; it’s just being smart. At AutoProv, we arm technicians with the precise vehicle data they need to perform every service, including an oil change, exactly to the manufacturer's standards.
At the end of the day, an oil change is often just one part of a car's overall maintenance schedule. To see how it fits into the bigger picture, check out our complete UK guide on car service prices.
Common Questions About Changing Engine Oil
Even with a detailed guide in front of you, it’s completely normal to have a few lingering questions about an engine oil change. Getting the little details right is what separates a good job from a great one, protecting both your car and yourself.
We’ve pulled together some of the most common queries we hear from UK drivers to give you clear, no-nonsense answers.
How Often Should I Really Change My Oil?
The old "every 12,000 miles or 12 months" rule is a decent starting point, but it's not set in stone. Your driving habits play a massive part.
If your car spends most of its life on short, stop-start town trips or sitting in traffic, the oil works harder and breaks down faster. In that case, you’ll want to change it more often. On the other hand, if you're mainly cruising on the motorway using a top-quality synthetic oil, you might safely stretch that interval a bit. Your vehicle's handbook is always the best place to check for the manufacturer's specific advice.
What Are the Key Warning Signs?
Your car has a way of telling you when something's not right. The most obvious sign, of course, is the oil maintenance light flicking on your dashboard. You might also notice the engine sounds a bit louder or develops a 'knocking' noise – a classic symptom of poor lubrication.
Other clues to watch out for include Dark, Gritty Oil; if you pull out the dipstick and the oil on it looks black and feels gritty between your fingers, it’s saturated with contaminants and well past its best. A Burning Oil Smell inside the cabin can be a red flag for an oil leak dripping onto hot engine parts. Finally, watch for Excessive Exhaust Smoke; a plume of blue-ish smoke from your exhaust isn't normal and often means oil is getting into the combustion chamber and being burnt up.
Frequently Asked Questions
AI-Generated Content Notice
This article was created with the assistance of artificial intelligence technology. While we strive for accuracy, the information provided should be considered for general informational purposes only and should not be relied upon as professional automotive, legal, or financial advice. We recommend verifying any information with qualified professionals or official sources before making important decisions. AutoProv accepts no liability for any consequences resulting from the use of this information.
From our AI insights
- Navigating Seasonal MOT Challenges in the UK
Learn how seasonal changes can impact your MOT and how to prepare effectively.
- Navigating UK Car Dealership Regulations
Discover essential UK car dealership regulations and compliance tips.
- Mastering Vehicle Valuations for UK Traders
Learn the essentials of vehicle valuations and how AutoProv supports UK traders.
Related Articles

Car Specs by Reg: Instantly Find Vehicle Details & MOT History
Trying to find the full car specs by reg? In the UK, that little number plate is the key to unlocking a huge amount of information about a vehicle. From the exact engine size and CO2 emissions to its MOT history and tax status, it's all tied to the registration.

How to Check Previous Owners of a Car in the UK
Before you even start thinking about how to check the previous owners of a car, you need to get your head around why it's so important. This isn't just about being nosy; it’s a non-negotiable step that protects you from serious financial headaches and safety risks lurking under a shiny bonnet.

How to Check Service History in the UK
Think of a car's service history as its detailed CV, not just some dusty folder in the glovebox. To check service history is to get the real story behind a vehicle, digging into everything from its routine oil changes to any major surgery it's had. For any savvy car buyer in the UK, this record is the single most important document you can get your hands on.
Published by AutoProv
Your trusted source for vehicle intelligence
